Lightshot: The Smarter Way to Screenshot, Fast, Clean, Reliable Screen Captures.
Welcome to the Screenshot.hair. In our increasingly digital lives, the ability to capture what's on our screens has become an indispensable skill. A screenshot, also known as a screen capture or screen grab, is a digital image that shows the contents of a computer display or mobile device screen at a specific point in time. From preserving important information to sharing visual cues, screenshots serve a multitude of purposes. This comprehensive guide will explore the significance of screenshots and provide detailed instructions on how to take them across various platforms.
What Is a Screenshot?
A screenshot, also known as a screen capture or screen grab, is a digital image of whatever is currently displayed on your computer, smartphone, or tablet screen. It allows users to save and share exact visual content, whether it's a webpage, error message, conversation, or graphic layout.
Screenshots are commonly used for tutorials, technical support, evidence collection, and visual communication. Tools like Lightshot or built-in OS features make capturing and editing screenshots simple and fast.
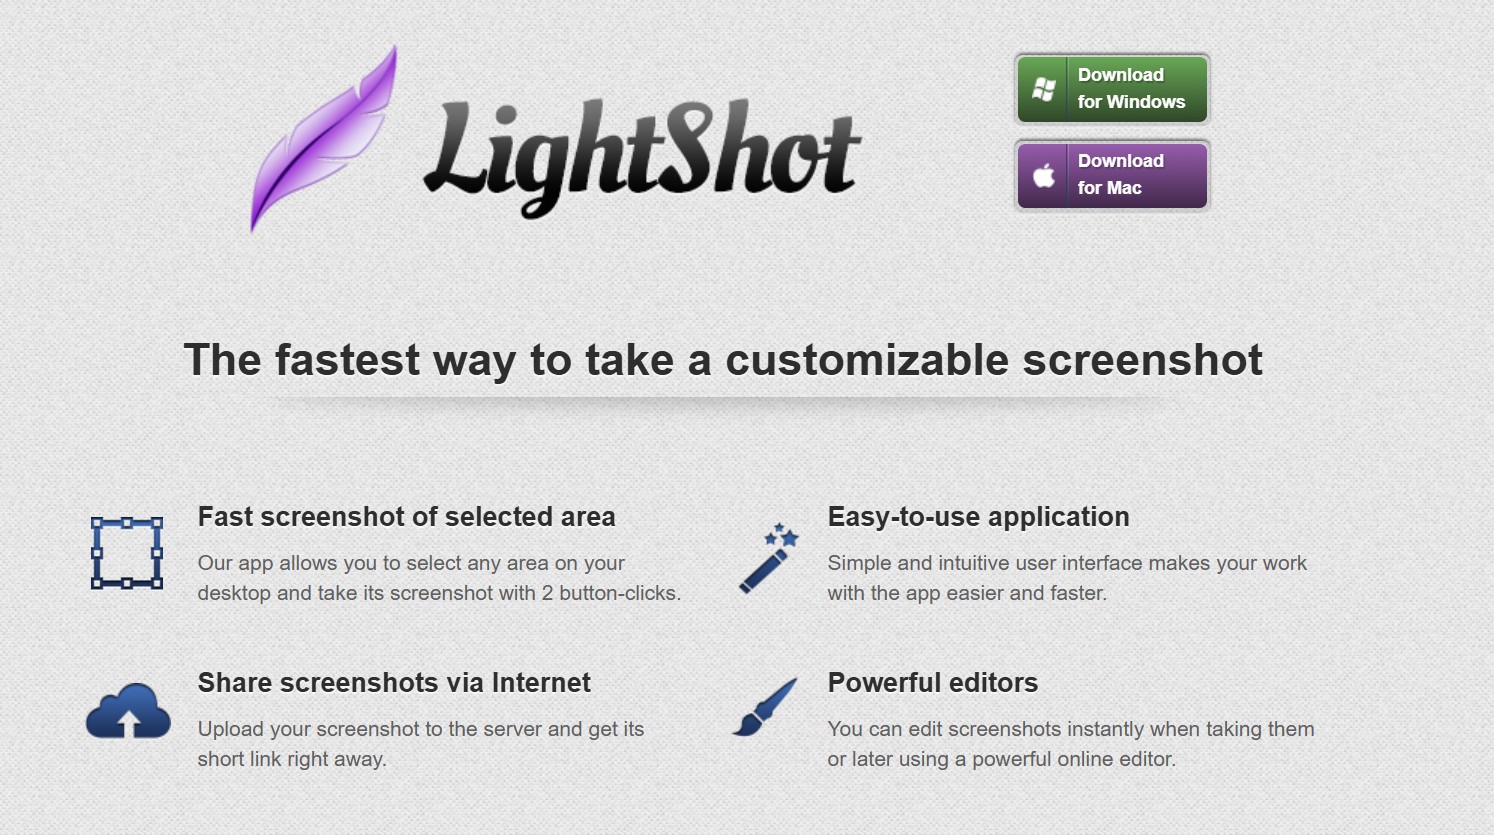
What Is Lightshot?
Lightshot is a lightweight, free screen capture tool designed for Windows and Mac that allows users to take customizable screenshots with ease. Unlike the default screenshot functions built into operating systems, Lightshot offers more control and speed—letting you instantly select any area on your screen, edit the capture, and either save it locally or upload it to the cloud for instant sharing.
With its intuitive interface and built-in editor, Lightshot is ideal for professionals, students, and everyday users who want a fast and reliable way to capture what’s on their screen. Whether you're documenting issues, saving information, or sharing ideas visually, Lightshot provides a seamless and efficient experience.
Why Screenshots Are an Essential Digital Tool
The utility of screenshots spans numerous applications, making them a vital tool for various tasks:
- Preserving Information: Screenshots allow you to save ephemeral content that might disappear, such as social media posts, chat messages, or website elements.
- Troubleshooting and Support: When encountering software issues, a screenshot can visually communicate the problem to technical support, facilitating quicker resolutions.
- Creating Tutorials and Guides: Visual aids in the form of screenshots are invaluable for illustrating steps and processes in how-to guides.
- Sharing Moments and Conversations: Screenshots enable you to easily share snippets of online interactions or humorous content with others.
- Documenting Errors and Bugs: In software development and testing, screenshots serve as crucial evidence for reporting and tracking errors.
- Capturing Inspiration: Whether it's design ideas, website layouts, or creative content, screenshots allow you to quickly save visual inspiration.
How to Screenshot on Windows
Capturing a screenshot on Windows is quick and convenient, whether you’re saving important information or sharing something on your screen. There are several built-in methods to take screenshots depending on your needs.
1. Using the Print Screen (PrtScn) Key
Press the PrtScn key to capture the entire screen. The image is copied to your clipboard. You can then paste it into an application like Paint or Word by pressing Ctrl + V.
2. Windows + Shift + S (Snip & Sketch Tool)
Press Windows + Shift + S to open the Snip & Sketch tool. This lets you select a portion of the screen. The screenshot is copied to your clipboard and can be edited or saved directly from the notification.
3. Using Windows + PrtScn
To automatically save a full-screen screenshot, press Windows + PrtScn. The image is saved in the Pictures > Screenshots folder.
4. Using Snipping Tool
Open the Snipping Tool from the Start menu. Choose a snip type (free-form, rectangular, window, or full-screen), take your screenshot, and save or annotate it directly within the tool.
5. Using Third-Party Tools like Lightshot
For more flexibility, tools like Lightshot allow you to quickly select, annotate, and share screenshots. Simply press PrtScn after installation, select your desired area, and access editing options instantly.
How to Screenshot on PC with Lightshot
Taking a screenshot on your PC using Lightshot is quick, simple, and highly efficient. First, download and install Lightshot from the official website. Once installed, simply press the Print Screen (PrtScn) key on your keyboard. Your screen will dim slightly, allowing you to click and drag to select the area you want to capture.
After selecting the area, you’ll be presented with editing tools—add text, arrows, or highlights right away. When you're finished, you can save the image to your PC or upload it to the cloud to get a shareable link instantly.
Lightshot is one of the most user-friendly screenshot tools for Windows, making it ideal for students, professionals, and everyday users who need fast and clean screen captures.
How to Take a Screenshot on Windows PC
Windows offers several built-in methods for capturing your screen:
Using the Print Screen Key (PrtScn)
Pressing the PrtScn key copies your entire screen to the clipboard. You'll then need to paste it into an image editor (like Paint) to save it.
Capturing an Active Window (Alt + PrtScn)
Pressing Alt + PrtScn captures only the currently active window and copies it to the clipboard.
Saving Directly to a File (Windows key + PrtScn)
Pressing the Windows key + PrtScn will take a full-screen screenshot and automatically save it as a PNG file in your Pictures/Screenshots folder.
Leveraging the Snipping Tool / Snip & Sketch
The Snipping Tool (Windows 10 and earlier) and Snip & Sketch (Windows 10 and later) allow for more selective captures (rectangular, free-form, window, full-screen) with basic annotation options.
Utilizing the Xbox Game Bar (Windows key + G)
The Xbox Game Bar (Windows 10 and later) can capture screenshots of games or applications using the Windows key + Alt + PrtScn shortcut.
How to Take a Screenshot on macOS
MacOS provides several convenient keyboard shortcuts for screen capturing:
Capturing the Entire Screen Shift + Command + 3
Pressing Shift + Command (⌘) + 3 will take a screenshot of your entire display and automatically save it as a file on your desktop.
Capturing a Selected Portion (Shift + Command + 4)
Pressing Shift + Command (⌘) + 4 turns your cursor into a crosshair, allowing you to drag a rectangle to select the area you want to capture. The screenshot is then saved to your desktop.
Capturing a Specific Window (Shift + Command + 4 + Spacebar)
After pressing Shift + Command (⌘) + 4, press the Spacebar. Your cursor will turn into a camera icon. Click on the window you want to capture. The screenshot will be saved to your desktop.
How to Take a Screenshot on Mobile Devices
The method for taking screenshots on smartphones and tablets varies slightly depending on the manufacturer and operating system:
iPhone (iOS)
- iPhone with Face ID (e.g., iPhone X and later): Press and quickly release the Side button (power button) and the Volume Up button simultaneously.
- iPhone with Home Button (e.g., iPhone SE 2nd gen and earlier): Press and quickly release the Home button and the Top button (or Side button) simultaneously.
The screenshot will be saved to your Photos app.
Android
The most common method across Android devices is to press and hold the Power button and the Volume Down button simultaneously for a brief moment. Some manufacturers may have slight variations or gesture-based options (check your device's manual).
The screenshot is typically saved to your Gallery or Photos app in a Screenshots album.
Enhancing Screenshots with Third-Party Tools
For users seeking advanced features like annotation, scrolling screenshots, or integrated sharing, numerous third-party applications are available for both desktop and mobile platforms. Popular options include:
- Desktop: Lightshot, ShareX, Greenshot, Snagit.
- Mobile: Screen Master, AZ Screen Recorder (often includes screenshot functionality), Skitch.
These tools often provide more control and functionality compared to the built-in options.
Conclusion
Mastering the art of taking screenshots is a fundamental skill in today's digital age, enabling effective communication, information preservation, and problem-solving across various devices. By understanding the built-in methods and exploring the capabilities of third-party tools, you can efficiently capture and utilize visual information to enhance your digital experiences.
Frequently Asked Questions About Screenshots
How do I take a basic screenshot on a Windows PC?
The simplest method is to press the PrtScn (Print Screen) key on your keyboard. This copies your entire screen to the clipboard. You then need to paste it into an image editor (like Paint) and save it. For direct saving, press Windows key + PrtScn; this saves the screenshot automatically to your Pictures/Screenshots folder.
What is the Snipping Tool, and how do I use it?
The Snipping Tool (or Snip & Sketch in newer Windows versions) is a built-in Windows utility that allows you to capture specific parts of your screen. To use it, simply search for "Snipping Tool" in your Start Menu, or press Windows key + Shift + S to activate the Snip & Sketch overlay. You can then select rectangular, free-form, window, or full-screen areas to capture, and basic annotation tools are available.
How do I screenshot on a Mac?
macOS offers several keyboard shortcuts: Shift + Command (⌘) + 3 captures the entire screen. Shift + Command (⌘) + 4 lets you drag a selection box. Shift + Command (⌘) + 4 + Spacebar changes your cursor to a camera, allowing you to click on a specific window. All these automatically save the screenshot as a file on your desktop.
How do I take a screenshot on an iPhone or Android phone?
On most iPhones with Face ID (no home button): Press the Side button and Volume Up button simultaneously.
On iPhones with a Home button: Press the Home button and Side/Top button simultaneously.
On most Android phones: Press and hold the Power button and Volume Down button simultaneously for a brief moment. Some Android devices might also have gesture-based methods or dedicated buttons.
Screenshots are typically saved to your device's Photos or Gallery app.
Where do screenshots save by default on Windows?
When you use the Windows key + PrtScn shortcut, screenshots are automatically saved as PNG files in your "Pictures" folder within a subfolder named "Screenshots". If you use other methods, they are usually copied to your clipboard, requiring you to paste them into an application to save.
Can I edit screenshots after taking them?
Yes, absolutely! Most operating systems offer basic editing tools (like cropping or basic annotations) immediately after a screenshot is taken (e.g., Snip & Sketch on Windows, or the preview thumbnail on iOS). For more advanced editing, you can use built-in image editors like Paint or Photos, or more powerful third-party software like Lightshot, ShareX, or Adobe Photoshop.
Are there third-party tools that offer more features than built-in screenshot options?
Yes, many third-party applications provide enhanced functionalities beyond the standard built-in tools. These often include features like advanced annotation, scrolling captures (for entire webpages), automated cloud uploads, customizable hotkeys, and even screen recording. Popular examples include Lightshot, ShareX, Greenshot, and Snagit for desktop users.
What are screenshots used for?
Screenshots are used to capture and share visual information quickly. They’re ideal for creating guides, troubleshooting tech issues, or saving important content.
How do I take a screenshot on Windows?
Press the PrtScn key to capture the entire screen or use tools like Snipping Tool or Lightshot for more precise control and editing features.
Can I take screenshots on a Mac?
Yes. Press Command + Shift + 4 to select a portion of your screen or Command + Shift + 3 to capture the entire display. The image will save to your desktop automatically.
Are screenshots high quality?
Most screenshots are captured in full resolution, meaning they reflect the exact quality of your screen. However, quality can vary depending on the tool and format used to save them.
Is it legal to take screenshots?
In most cases, yes. Taking screenshots for personal use, education, or support is generally legal. However, capturing copyrighted or private material without permission may violate policies or laws.